


Inside Amity Coffee Shop and Bakery, Penn Yan, New York.
In October I fell in love with the adorable village of Penn Yan, in Upstate New York, and with it the Amity Coffee Shop and Bakery. It was located downstairs from my Airbnb, where beginning around midnight my dreams were literally filled with the aromas of all kinds of baked goods as those wee hours are when professional bakers work while the rest of the world slumbers. This incredible bakery baked seemingly everything, from its own bagels, cookies, croissants and quiches, to even a daily assortment of macaroons, which I consider The Most Difficult Cookie to make in the world.
When I raved about the wide variety, and how that bakery baked everything, with a look of seriousness, the clerk corrected me. “We don’t make sourdough bread,” she said.
As a fairly experienced baker myself, I found this statement puzzling. I mean, the bakery had already mastered some really difficult things, like croissants and macarons, yet they shunned sourdough? Huh. Weird.
I now know that it’s not weird at all, because the last two months have taught me that sourdough is a whole other level of baking that makes a baker long for the days when she could just rely upon a simple yeast packet to make bread rise. Sourdough bread requires commitment and concentration, but the results are worth it with just a few ingredients: flour, water, and salt. Sourdough is all about the starter, which undergoes a fermentation process that creates natural bacteria and yeast. A healthy starter is living thing and the most crucial ingredient in any sourdough product. Sourdough can be easier to digest that regular bread, and especially store-bought processed breads.
I intentionally don’t have a pet in my life, precisely so I can be footloose and fancy free without a care in the world, but now I have a commitment to a jar of sourdough starter in my refrigerator. I can’t just let it die, because it took weeks and painstaking weeks to feed it, adjust it and care for it until it finally came alive and was ready for me to bake with.
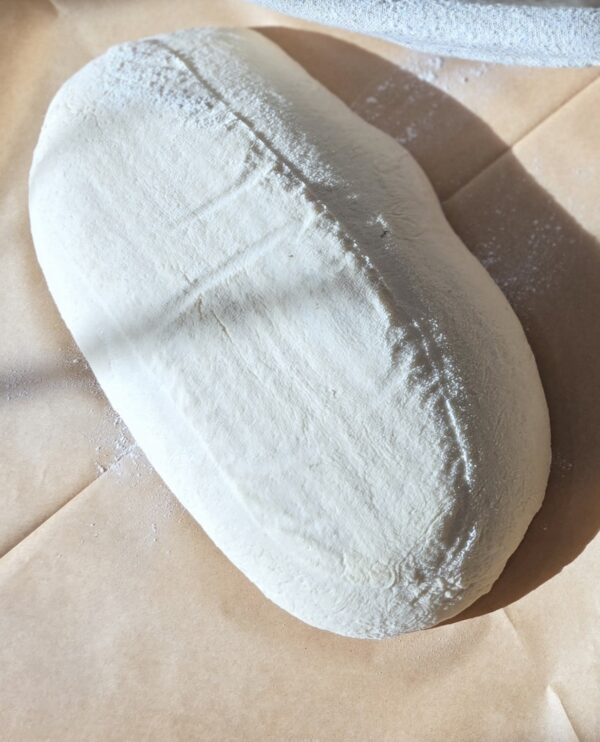
See this bread? It’s my first loaf of sourdough bread. It was more than two months in the making.

Most of those weeks were spent trying to grow my own sourdough starter, something folks on Facebook advised should take just a few days. Others said it could take longer, like weeks, or even months, depending upon things like your home’s internal temperature. I keep my house cool, so that could have been the issue.
I blame Facebook for ensnaring me in the insane sourdough world. This culinary journey began as one short reel about how fun and easy it was to make your own sourdough starter. From there I foolishly started following more than a dozen conflicting Facebook sourdough experts. You think politics gets nasty on Facebook? Wade into the world of sourdough wars and you’ll see a whole ugly level of condescension and putdowns.

Some of the cruelest comments I’ve ever seen were on sourdough social media posts, where self-proclaimed expert sourdough bakers rip into insecure novice bakers and mock their loaves. Look at that crumb! Did you even do a proper bulk fermentation? Did your starter smell funky? Did you use distilled water? Did you use a Dutch oven? Did you preheat the oven to 500 degrees for an hour before baking? Did you discard?
Good uses for discarded starter
Discarding a portion of a starter is a given in the sourdough world. Initially, it was something I couldn’t get my head around. Wait. You mean to tell me that you spend all these weeks growing your own sourdough starter, but now that it’s alive, you’re supposed to throw away some of the starter before you feed it with more flour and water? That seemed so wasteful to me, until I finally got the whole ratio thing. Unless you’re baking in an institutional kitchen and need to make multiple loaves of sourdough bread every day, if you continue to feed your starter at the initial rate every day, without discarding some, it will grow into a monstrous size, and you’ll waste a lot of money on flour that’s literally going to be thrown away.
Something else I learned is that you don’t need vast quantities of starter in the refrigerator. Some people keep tiny amounts — such as would fit in a baby food jar — and then, a few days before baking, they can start feeding the starter to grow however much you need.
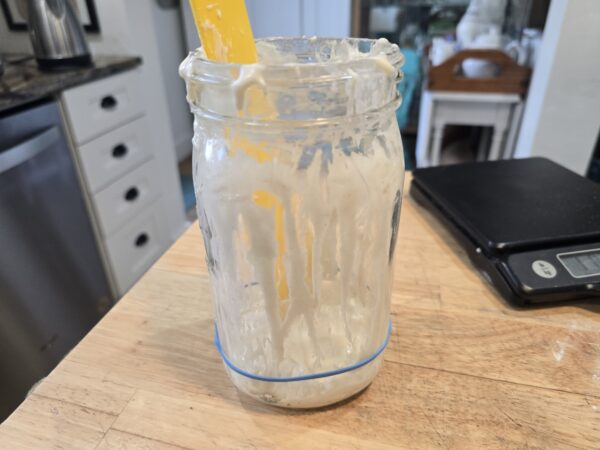
When I made my last batch of bread, I used almost all of the starter, but I still had enough left in the jar to scrape out and put in a new clean jar, ready to start all over again.
More about the whole discard process. The good news is that there are many recipes that use discarded sourdough starter. Just Google it. Or, if you’re sick of cooking, you can pour some warm water in a jar with the discarded starter, shake it up, then use it in your garden as a great fertilizer. I’ve done that already and look forward to seeing how my plants respond.
Some people even feed the discarded starter to their chickens. The main thing is to avoid getting starter into your plumbing. If you can imagine the kind of explosive bacterial power that can cause starter to expand — double, triple, quadruple – in volume, just imagine what disaster it could wreak in pipes that have a nice, steady supply of warm water. This is serious business. Wipe down your jars with a wet paper towel, and wipe down all utensils with a paper towel before washing.
Second sourdough attempt
The last time I tackled sourdough was at the start of the pandemic. Remember that? :: shudder:: It’s only been six years, but it seems like so much longer that for some reason I’ve completely blocked out memories of my first sourdough bread attempts. For that matter, I’ve blocked out some of the earliest parts of the pandemic, too, which is a good thing. This go-round, it was as if I had pandemic amnesia, and I was starting from scratch. That’s OK, because this time, I know more, and have some tricks I didn’t have before.
For one thing, I have watched many sourdough bakers’ videos. I admit that the more I watched and the more I read, the more confused I became. With sourdough, it’s not like typical yeast bread, with lots of kneading. No, with sourdough, bakers talk about using wet hands to pull and stretch the dough and slap it on the counter. Pull and stretch and turn and fold and pull and stretch and fold and turn. Then let it rest 30 minutes and do the whole dang thing all over again. Rest for 30 minutes, then do the pull and stretch thing over again and again. And ratios! Starter, flour, water. 1:1:1:, or 1:5:5:, and on and on. I’m not a math person, and some of these videos made me feel as if my I.Q. was dropping with every word.
I kept telling myself that pioneer women probably didn’t complicate sourdough baking, so why should I?
First of all, I soundly rejected that whole wet-handed stretch, pull, slap, rest the dough for 30 minutes nonsense. All the mess. All the hand-washing. Instead, once the dough was made (see recipe below) I dumped the whole mess in my KitchenAid mixer bowl, and using the dough hook attachment, mixed it until it was a shaggy mess. I then covered it with a plastic bag.
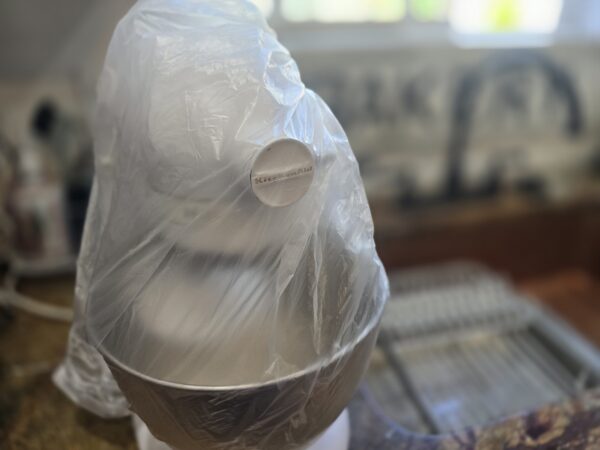
The KitchenAid hangs out with a bag on its head as it rests for 30 minutes. Fun fact, this mixer once belonged to the lovely Peggy Lewis, mother of intrepid reporter Jon Lewis.
Every 30 minutes I turned on the mixer for a few spins to replicate the whole stretch, pull, fold business, then covered it with the plastic bag again. So easy!
My recipe below uses an electric standing mixer. If you don’t have one, or don’t want to use one, then you may certainly do everything by hand. Although I call my method the Lazy Girl’s Guide to Simple Sourdough, to clarify, I’m not lazy. However, all that repetitive stretching, pulling, and folding the dough with wet hands just didn’t appeal to me. Gosh, I have a KitchenAid just sitting there, at my beck and call, and I decided that the mixer would do just fine. I was right. It worked. I must say, I’ve not seen any other bakers suggest using an electric stand mixer for this crucial sourdough step, so I’m pretty impressed that I came up with this time-saving tip.

I’m also happy to say that I finally succeeded in mastering my own sourdough starter, so I can share the easiest way for you to make your own, too.
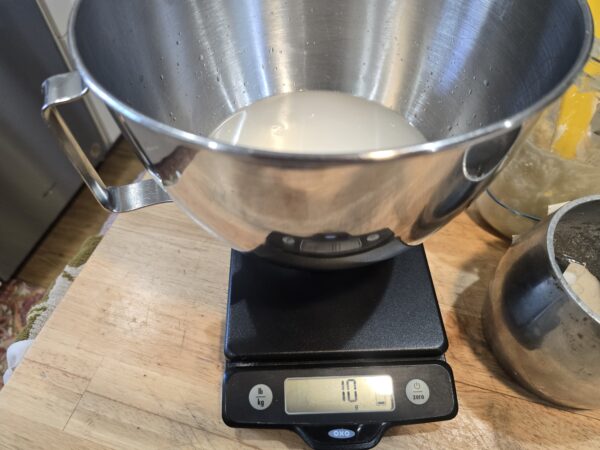
One thing I will recommend is that you buy a cooking scale. I cannot imagine making sourdough bread without one.

Believe me when I say that a cooking scale will make things much easier. And I know that this is tough for us Americans, but this is a good time to get used to using grams, not ounces. Even so, for your sourdough starter recipe, I’m using cups, just this once. The scales can alternate between lb. and kg., so that’s helpful.
Sourdough starter recipe

This jar of active starter sits patiently on Doni’s counter where it will soon triple in size.
Ingredients:
Flour (nothing fancy, just unbleached all-purpose flour)
Bottled or distilled water
Day 1: In a large clean jar mix 1/2 cup each flour and water. Stir well to incorporate. Use a rubber band to cover the jar with a piece of cloth or paper towel.
Day 2: Remove the cover and gently stir the starter a few times during the day. Place the the cover back on the jar. You may or not see little bubbles. No worries.
Day 3: Pour out half the starter into the garbage, or in another container to use elsewhere. (NEVER pour starter down the drain. Active starter will cause plumbing issues.) Now, feed the remaining starter with 1/2 cup each flour and water. Stir well. Cover.
Day 4 — until however long it takes: Each day continue to discard half the starter and refeed it with 1/2 cup each of flour and water. Stir well, and cover. You should start seeing bubbles appear, and you might notice a yeasty smell. That’s good. Depending upon your home’s temperature, this process could take take as few as five or six days, or as many as several weeks. Be patient. Put a rubber band on the jar to show the height of the fed starter, so you can monitor its progress.
You’re ready to use your starter for baking when it doubles in size within 4 to 6 hours of feeding, and when it smells slightly tangy. (Some bakers say it’s ready when a blob of starter will float in water, but mine never did float, although it was obviously plenty activated.)

This successful sourdough starter has risen to the point where it’s ready to use in baking. Those dark spots are just clear air bubbles.
Although my sourdough bread tasted fine, and it had a nice crumb, I learned a few things. For one thing, I had doubled the recipe without really thinking about if — or how — everything was going to fit into my pair of Dutch ovens. Big mistake.

I had already formed the dough and placed it in the refrigerator in a couple of those fancy linen-lined bannetons baskets, which are intended as a keeping place after the dough has been shaped, and it needs to proof (or ferment). They’d been in the refrigerator, and when it was time to bake, some impressive air pockets had formed.

This wasn’t a big deal, because you flip the dough over — ugly sides down before putting them into the Dutch ovens. Even so, in retrospect, I should have popped the air bubbles.
Clearly, both baskets had too much dough for the Dutch ovens. But with risen dough, you just can’t cut it to fit, because it will deflate.

So I placed the large round ball of dough into the red Dutch oven, and I scrunched the oblong one up like a floppy “C” and plopped it into the smaller blue Dutch oven. This was a feat in itself because the Dutch ovens had been in a 500-degree oven, and were deadly hot. I decided I’m not a fan of preheating the Dutch ovens for an hour in a 500-degree oven. It’s too easy to get burned.
Because of the heat, there wasn’t a way to spend much time safely adjusting the dough. Instead, I just eased the dough in each Dutch oven as quickly as possible, realizing immediately that there would be some cosmetic issues later.
If you’ve ever tried to squeeze a post-holiday body into a pair of jeans that fit 10 pounds ago, then you get the idea.
 The loaves were so big that once baked, I had enough to cut into several sections for family, friends and neighbors, all of whom pronounced it delicious. (I cut off that weird deformed end and threw it away.)

One thing I like about making sourdough bread is that if you plan ahead, it could literally be nearly two full days before you actually have baked bread. The recipe I used is a compilation of a few recipes, but if you’re in a hurry, there are some bake-the-same-day recipes out there. Me? I’m cool with the longer process.
The other thing I like about making anything out of sourdough is that if I make a mistake, it’s not like I’m ruining a $170 prime rib. We’re talking flour, water, salt, and starter, which is just flour and water that’s fermented.
Finally, the thing I like best about any kind of baking, especially something challenging, like sourdough, is it’s satisfying to tackle something and eventually succeed. This time around, as I become reacquainted with sourdough, we’re not in the middle of a pandemic. But we are living in an extremely unstable world where we don’t dare imagine the worst. Sourdough baking takes a fair amount of concentration, which can be a Godsend momentarily, as our minds can stray from things like war, and rumors of war, and instead fixate briefly on something as simple as making sourdough bread for yourself and others.
Call it denial, but apparently I’m not the only one embracing sourdough when the going gets tough. This Facebook meme pretty much sums up my use of sourdough as a distraction from scary times.

One more thing, something I learned from my research about sourdough starter is that it’s pretty forgiving. Once it’s made, it will keep in the refrigerator for weeks without you even checking on it. Some people brag they can leave it for months in the refrigerator without any problems. But gosh, I worked so hard to get a good starter. It’s important that I take care of it. That’s why, just for good measure, I’ll periodically check in to see how it’s doing. I’ll take a peek, and take a sniff. If it develops a gray liquid on top, I’ll pour off the liquid, and give it a good stir. Maybe for a treat, I’ll even feed it a teaspoon or so of flour, and a sip of water, from time to time, just so it doesn’t think I’m ignoring it, or that I’m practicing macarons or croissants, like the Amity Bakery. The way I see it, if I’m good to my sourdough starter, it will be good to me. With a little bit of luck, no matter what, we can enjoy a long and happy relationship together for many years to come.

Simple sourdough bread recipe

Doni’s first sourdough bread loaves wouldn’t win a beauty contest, but they were delicious.
150 grams of active starter
350 grams of water (tap water or bottled water)
500 grams of flour
10 grams of salt
Place a mixing bowl on the food scale, and “tare” it to zero on the kg setting. (When you “tare” the scale you’re forcing it to ignore the weight of the bowl, or whatever else is on the scale.)
Add 150 grams of starter to the bowl.

Tare the scale to zero again (now the scale is ignoring the bowl and the starter). Add 350 grams of water.
 Tare the scale to zero again (this time, the scale is ignoring the weight of the bowl, the starter, and the water). Add 10 grams of salt.
Finally, tare the scale to zero again (the scale is ignoring the weight of the bowl, the starter, the water and the salt). Add 500 grams of flour.

Remove the bowl from the scale. Bring it to the electric stand mixer. Using the dough hook, give the mixer 4 to 6 on/off pulses, enough for the dough to slap around the inside of the bowl a few times. Cover the KitchenAid and the bowl again. Let rest for another 30 minutes.

Remove the cover, and again pulse the KitchenAid approximately 4 to 6 times, letting the dough stretch and slap the inside of the bowl. Cover the KitchenAid and the bowl again. Let rest for another 30 minutes.
Remove the cover, and again pulse the KitchenAid approximately 4 to 6 times, letting the dough stretch and slap the inside of the bowl. Cover the KitchenAid and the bowl again. Let rest for the final 30 minutes.

Remove the dough hook, and remove the bowl from the KitchenAid. Cover again. Choose a place in your kitchen for the dough to “bulk ferment” in a draft-free place until the dough has doubled in size. Depending on the temperature of your kitchen, and your starter’s level of activity, this could take anywhere between 6 to 12 hours. (If you need to go to bed, put the entire covered bowl in the refrigerator. In the morning, remove the bowl and let it come to room temperature and continue rising.)
The dough should have doubled in size, but don’t let it over ferment and grow beyond that point.
Dump out the dough onto a lightly flour surface. Make the number of dough balls, depending upon the size of your baking vessel, whether it’s a Dutch oven, cast iron pans, or even loaf pans.
Gently fold and pinch the dough into the desired size and shape, pinching a seam to hold the dough together. Place the dough — seam side up — into a floured tea-towel-covered banneton, or bowl, or Tupperware. Cover with plastic. Place the container(s) in the refrigerator and let rest for 12 to 15 hours. (Or, you can let it rise at room temperature for 3 to 4 hours.)
Preheat oven to 425 degrees. Using a sharp knife, score the bread with some slashes to allow steam to escape. Place a piece of parchment paper on the counter for each loaf, and generously sprinkle with flour to help avoid the dough from sticking to the paper. Carefully transfer the dough — seam side down this time — onto the parchment. Hoist the parchment — like a sling — and ease the parchment with the dough into the cold Dutch oven (or other baking container). Cut away any excess parchment that’s sticking up, to avoid a fire.
Place a lid over the Dutch oven or other container. If you don’t have a lid, use a piece of foil and crimp the sides tightly. Bake for approximately 40 minutes, or until about 190 degrees. Remove lid and bake for another 10 minutes more, or until internal temperature is between 205 to 210 degrees F. (Times may vary depending upon size of loaves, and the kinds and sizes of baking containers.)
###
